Introduction
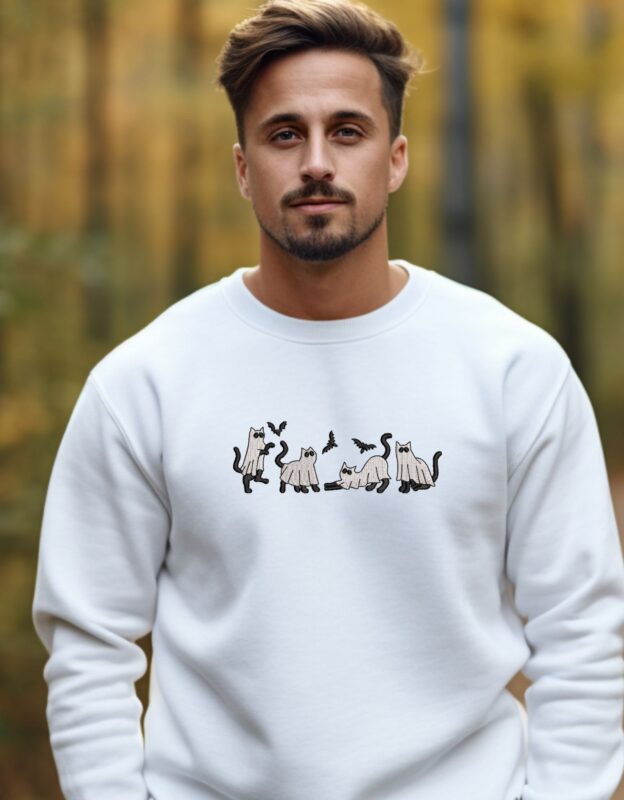
Spooky season is upon us, and what better way to embrace the eerie and enchanting atmosphere than by unleashing your creativity through spooky sweatshirt embroidery? In this article, we’ll dive into the world of DIY spooky sweatshirt embroidery, exploring unique ideas, techniques, and tips to help you craft one-of-a-kind, spine-chilling wearables. Whether you’re a seasoned embroidery enthusiast or a newbie eager to try something new, this article will guide you through the process of adding a touch of Halloween magic to your wardrobe.

Table of Contents
The Art of Spooky Embroidery
1. Gathering Your Materials
Before you embark on your spooky embroidery journey, gather the essential materials. You’ll need: A plain sweatshirt Embroidery hoop Embroidery thread in various spooky colors Embroidery needles
Scissors Fabric marker Spooky embroidery patterns (available online)
2. Choosing the Perfect Design
Selecting the right design is crucial. Consider classic Halloween motifs like pumpkins, witches, ghosts, or black cats. Customizing your design is also an option; let your imagination run wild!
3. Preparing Your Sweatshirt
Wash and dry your sweatshirt to ensure it’s clean and free of wrinkles. Use a fabric marker to lightly trace your chosen design onto the fabric.Getting Down to Business
4. Setting Up Your Embroidery Hoop
Place the sweatshirt fabric into the embroidery hoop, ensuring it’s taut but not stretched. This will provide a stable surface for your embroidery work.
5. Thread Selection for spooky season

Choose embroidery thread colors that match your spooky design. Consider metallic threads to add a glistening, otherworldly touch to your embroidery.
6. Basic Embroidery Stitches
Learn basic embroidery stitches like the backstitch, satin stitch, and French knot. These stitches will help you bring your spooky design to life.
7. Embroidering Your Design Spooky embroidery
Follow your traced design, carefully filling in each element with your chosen stitches. Take your time and pay attention to detail.
8. Experiment with Texture
Consider using different textures in your embroidery, like fuzzy threads for a tactile sensation or glow-in-the-dark threads for a surprising effect in low light.
9. Incorporate Beads and Sequins
Add some sparkle and dimension to your spooky sweatshirt by incorporating beads and sequins into your design.
10. Mixing and Matching
Don’t limit yourself to just one design. Mix and match different spooky elements on your sweatshirt for a truly unique look.
Finishing Touches
11. Removing Traces
After completing your embroidery, carefully erase any remaining fabric marker traces using a damp cloth or by washing your sweatshirt again.
12. Ironing
Gently iron your embroidered sweatshirt inside out to set the stitches and remove any wrinkles.
Conclusion for Spooky season

Spooky season sweatshirt embroidery allows you to combine your love for Halloween with your creative skills. With the right materials, designs, and techniques, you can craft a sweatshirt that’s not only stylish but also uniquely spooky. Embrace the spirit of the season and let your imagination run wild as you create wearable art that will turn heads and spark conversations.
FAQs
1. Can I use any type of sweatshirt for embroidery?
Yes, you can use various types of sweatshirts, but it’s essential to choose one with a fabric that’s suitable for embroidery, like cotton or fleece.
2. Where can I find spooky embroidery patterns?
You can find a wide range of spooky embroidery patterns online, both for free and for purchase. Websites like Etsy and Pinterest are great places to start.
3. Do I need embroidery experience to get started?
No, beginners can dive into spooky embroidery! Numerous tutorials, a multitude of resources, and a plethora of materials are at your disposal, all designed to assist you in mastering the fundamentals.
4. How long does it take to complete a spooky season embroidery project?
The time required depends on the complexity of your design and your embroidery skills. A simple design can be completed in a few hours, while more intricate projects may take several days.
5. Can I wash my embroidered sweatshirt?
Yes, you can, but it’s best to hand wash your embroidered sweatshirt or use a gentle cycle in the washing machine to preserve the embroidery’s quality and colors.

